Freezer meals. Can. not. tell. you. enough. I love these freezer meals. I'm definitely doing round 2 soon to get me through all the holiday events I'll have going on. If you are remotely busy, or ever dread cooking after a long day, I HIGHLY recommend doing this. See my initial explanation here.
This recipe turned out more liquid-y than I thought it would be, but it was very good. You can always add a little cornstarch mixed with cold water anytime things need thickening. Thin or thick it doesn't matter, this was yummy!
Ingredients
1 tbsp. olive oil
4 boneless skinless chicken breasts, sliced
1/8 tsp. salt
1/8 tsp. pepper
3/4 cup white wine
3/4 cup chicken broth
1/4 cup lemon juice
5 tsp. minced garlic
2 tsp. dried rosemary
2 tsp. Italian seasoning
1 small red onion, sliced
1 cup sliced red bell pepper
1 cup sliced yellow bell pepper
12 oz. spaghetti
Heat olive oil in a skillet over medium high heat. Season chicken with salt and pepper and cook in skillet for 2-3 minutes on each side. Divide chicken into gallon freezer bags. Divide remaining ingredients except noodles into bags. Label and freeze.
To serve: Thaw. Cook in crockpot on low for 4-6 hours. Prepare pasta according to package directions. Serve over chicken over pasta.
I divided this one into 2 gallon bags because it makes 6 servings. My general rule is, any recipe that makes more than 4 servings I divide into two bags. Totally depends on your family size.
Thursday, November 6, 2014
Monday, November 3, 2014
Asian Meatballs
If you've been following along, you I had this crazy idea to try approximately one thousand freezer meal recipes in July. We're still eating them and it has been an awesome time saver for us so far, especially on nights where I have a trunk show or some other commitment. You can see my overall approach on the the linked post, and where the orignal recipes came from. This one was supposed to be gluten free and dairy free, which I didn't follow exactly, I just wanted something I could make with ground pork. The original recipe called for ground chicken, but I subbed. We've heated these up for snacks, during football games, for a lazy dinner with some rice, just whatever. This is one of the only things in the whole cooking day that I actually cooked. They were a little time consuming since you have to roll the meatballs, but I will definitely make them again. If any of the chopping is intimidating, just use dried ginger and garlic to save a step or two. But oh.my.goodness. the way fresh ginger smells is worth it. It's like the cleanest most fresh smelling ingredient ever. If you've never used it, just cut away the peeling with a small knife and use a grater on the flesh of the ginger.
Ingredients
2 pounds ground pork
1 1/4 cup diced red onions
1 1/2 cups diced red bell pepper
1/4 cup crushed pineapple
1/4 cup soy sauce
1 tsp. fresh grated ginger
1/2 tsp. sesame oil
2 tsp. garlic, minced
1/2 tsp salt
1/4 tsp pepper
2 tbsp flour
Combine all ingredients in a large bowl. Scoop into rounded tablespoon sized balls and place on a cookie sheet lined with parchment paper. I ended up rolling these like when you play with play doh, but they aren't going to be as firm or ball like as a regular meatball because of all the liquid. Don't stress if they aren't perfectly round-they still taste phenomenal. Bake at 400 degrees for 15-20 minutes.
Once they come out of the oven, let them sit out for about 5 minutes to cool down just a little, then place the cookie sheet in the freezer to flash freeze the meatballs. Just freeze them until they are solid and won't stick together, maybe 20 minutes. You'll just have to check them. Then place them in a freezer bag. To serve, thaw in the microwave for 1-2 minutes.
These are super great to have in a pinch because you can reheat them so fast. What's your go to make ahead snack/meal?
Saturday, November 1, 2014
Pug's Pimento Cheese
My grandmother Peggy, who I reference on this blog often as Mamaw, grew up with everyone calling her Pug. Now that I'm thinking about it, out of her sisters, they all have nicknames. My great aunt Kathy is Kat and my great aunt Betty goes by Beck. All three are great cooks so I guess its no wonder I love to cook. Mamaw makes pimento cheese that is a southern staple with a little twist. This will in no way be the only pimento cheese recipe I put on this blog because I am constantly intrigued by variations that seem good. To start us off though, here is a heavily requested comfort food by my family and others. If someone has a baby, you should take this. If someone dies, take their family this. If work sucks, take this to the office. Just take it places. People will like you better. You will like yourself better. Trust me.
Ingredients
10 oz can Rotel Original Diced Tomatoes & Green Chilies, drained
1 cup mayonnaise
1 tsp. Worcestershire sauce
1/2 tsp. salt
16 oz. sharp Cheddar cheese, shredded (don't buy pre-shredded)
4 oz. jar diced pimentos, drained
Stir together first four ingredients in a large bowl. Stir in cheese and pimentos. Serve with crackers, veggies, or on a sandwich.
Saturday, October 11, 2014
Ensayo Chili
I love New Years. It's one of my most favorite holidays. Probably my second favorite. Thanksgiving is my favorite,obviously. It is all about the food. None of this stressful decorating/present wrapping nonsense. If you couldn't have gotten that right on a quiz about me you haven't been paying attention. I love the promise that a new year brings, the potential for anything to happen. I love new lists and goals- I love new starts. This year one of my resolutions was to branch out in my cooking more from Italian, which is my go to. I could experiment with pasta sauces for the next fifteen years. On January 1st I made a stuffed pork loin. Not worth the effort at all. On January 2nd, I made this chili. It was super fun to concoct and delicious! Don't be freaked out by the number of ingredients, it's not overly difficult. If the adobo pepper process freaks you out, I'll give you an alternate because that's a silly thing to stop you from eating this deliciousness.
If you are kind of a rookie, maybe do this adobo prep the day before to avoid getting overwhelmed and giving up. It isn't hard but it is a little time consuming. I did the whole can at once so I don't have pictures, because in January I wasn't blogging. I know. Can all 5 of you imagine not being able to read this blog?? Your poor, sad lives. BUT it was soooo nice today to just pull the ziploc bag out of the freezer and do zero work. I should have put this paragraph below my explanation but I was afraid my less adventurous ones would just give up and stop reading. DON'T.
Buy one can of chipotle chiles in adobo. Wear gloves. Pull out the chiles, slice them open, and get the seeds out. If I remember correctly (keep in mind this was 10 months ago) I used a paper towel to kind of wipe the seeds out. Put all the sauce and seeded chiles in a food processor and puree. Done! Now just freeze in a ziploc bag and you can break off chunks of your icey chile peppers whenever you need it! If this absolutely freaks you out I GUESS just use some dried crushed red pepper but just don't freak out okay?? You can handle this. It's just not that big of a deal. And later you can just all casual to a friend be like, "yeah I just keep my chipotle chiles pureed in the freezer for when I need them" and sound like a total foodie.
Now. Time for the ACTUAL recipe. This is a big big batch. You could half it for a small crowd. But why? Just freeze the leftovers for next time you're tired.
Ingredients
2 tbsp chipotle chiles in adobo sauce
1 jalepeno, pretty finely chopped
6 cups beef stock (I use bullion cubes. I made 6 cups like the instructions say, but then add one extra cube to make it richer)
2 tbsp oil (corn, vegetable, olive, it doesn't matter)
12 oz bacon, chopped
4 lb of ground beef
1/2 c Worcestershire
8 cloves of garlic, chopped
3 small onions, chopped
2 bell peppers, chopped
2 tbsp ground coriander
2 tbsp cumin
3 tsp oregano
1/2 tsp ground cloves
2 dashes of cinnamon
24 oz Negra Modelo beer or some other dark beer
28-30oz diced tomatoes, not drained
6 tbsp cornmeal
2 tbsp honey
2 tsp lime juice
Chop EVERYTHING before you start. In a saucepot, heat the beef stock, jalepeno and chipotle puree until it starts to simmer. Turn down to low and let it do its thing while you work.
Note: I am the world's biggest baby about spicy food and scary movies. If you love spicy, this is not the recipe for you. Increase your chipotle if you're one of those weirdos who likes their lips to feel like they've been pricked by a thousand tiny needles.
In your biggest soup pot, heat the oil over medium and once it's hot, add the chopped bacon. You don't need it to get crispy, just done, because it's kind of going to disappear in the chili anyway. Just get it cooked through. Next, add the ground beef, salt and pepper to taste, and Worcestershire at the same time. Cook it through. You may have to drain it, you may not. It just depends on how much grease is in it. Use your judgement.
Turn your heat down to medium low, add everything from garlic to cinnamon. See how I conveniently grouped the ingredients for you? I'm so thoughtful. Cook everything until the onions get soft.
Next, add the beer and turn up the heat to medium high. Let it reduce down a little. There is no science to this, you could skip reducing altogether and it would be fine.
After reducing, add everything in the last set of ingredients. Reduce heat to low and let simmer for 45 minutes.
My Aunt Pam taught me a super cool trick for measuring honey.Spray the measuring spoon with cooking spray. I really wanted to make a pun with Pam since it's my aunt's name but I'll spare you. The honey just slides right out! I was amazed. But I'm pretty easily amazed. I like to think of it as endearing and not silly.


Top with shredded cheese, sour cream, lime wedges, or serve over chips. Get crazy. Go with your gut. I prefer just cheese but you can eat whatever makes you happy.


Enjoy your deliciousness. Freeze your leftovers if there are any.
So this particular resolution yielded an awesome recipe. Only two more months until we get to make them all again! What's a resolution you've kept??
If you are kind of a rookie, maybe do this adobo prep the day before to avoid getting overwhelmed and giving up. It isn't hard but it is a little time consuming. I did the whole can at once so I don't have pictures, because in January I wasn't blogging. I know. Can all 5 of you imagine not being able to read this blog?? Your poor, sad lives. BUT it was soooo nice today to just pull the ziploc bag out of the freezer and do zero work. I should have put this paragraph below my explanation but I was afraid my less adventurous ones would just give up and stop reading. DON'T.
Buy one can of chipotle chiles in adobo. Wear gloves. Pull out the chiles, slice them open, and get the seeds out. If I remember correctly (keep in mind this was 10 months ago) I used a paper towel to kind of wipe the seeds out. Put all the sauce and seeded chiles in a food processor and puree. Done! Now just freeze in a ziploc bag and you can break off chunks of your icey chile peppers whenever you need it! If this absolutely freaks you out I GUESS just use some dried crushed red pepper but just don't freak out okay?? You can handle this. It's just not that big of a deal. And later you can just all casual to a friend be like, "yeah I just keep my chipotle chiles pureed in the freezer for when I need them" and sound like a total foodie.
Now. Time for the ACTUAL recipe. This is a big big batch. You could half it for a small crowd. But why? Just freeze the leftovers for next time you're tired.
Ingredients
2 tbsp chipotle chiles in adobo sauce
1 jalepeno, pretty finely chopped
6 cups beef stock (I use bullion cubes. I made 6 cups like the instructions say, but then add one extra cube to make it richer)
2 tbsp oil (corn, vegetable, olive, it doesn't matter)
12 oz bacon, chopped
4 lb of ground beef
1/2 c Worcestershire
8 cloves of garlic, chopped
3 small onions, chopped
2 bell peppers, chopped
2 tbsp ground coriander
2 tbsp cumin
3 tsp oregano
1/2 tsp ground cloves
2 dashes of cinnamon
24 oz Negra Modelo beer or some other dark beer
28-30oz diced tomatoes, not drained
6 tbsp cornmeal
2 tbsp honey
2 tsp lime juice
Chop EVERYTHING before you start. In a saucepot, heat the beef stock, jalepeno and chipotle puree until it starts to simmer. Turn down to low and let it do its thing while you work.
 |
| Simmering peppers in beef stock |
Note: I am the world's biggest baby about spicy food and scary movies. If you love spicy, this is not the recipe for you. Increase your chipotle if you're one of those weirdos who likes their lips to feel like they've been pricked by a thousand tiny needles.
In your biggest soup pot, heat the oil over medium and once it's hot, add the chopped bacon. You don't need it to get crispy, just done, because it's kind of going to disappear in the chili anyway. Just get it cooked through. Next, add the ground beef, salt and pepper to taste, and Worcestershire at the same time. Cook it through. You may have to drain it, you may not. It just depends on how much grease is in it. Use your judgement.
 |
| Making meat look not gross is impossible. |
 |
| I'm sorry. |
 |
| Chopped onions and garlic. |


 |
| I am absolutely immune to the smell of raw onions. But I promise you, this one blew my mind. Eyes burning as if I'd been sprayed with pepper spray. I was turning my head away and making faces as if I was being operated on with no anesthesia. And I know you love the embarrassing pictures. I mean who wouldn't want to see my hair like this? Sorry you can't see how much eyes are watering but this was my face of pure pain. This is how I appear any given Saturday. #blessed |
Next, add the beer and turn up the heat to medium high. Let it reduce down a little. There is no science to this, you could skip reducing altogether and it would be fine.
 |
| Kroger is not paying me to advertise their honey. |
After reducing, add everything in the last set of ingredients. Reduce heat to low and let simmer for 45 minutes.
My Aunt Pam taught me a super cool trick for measuring honey.Spray the measuring spoon with cooking spray. I really wanted to make a pun with Pam since it's my aunt's name but I'll spare you. The honey just slides right out! I was amazed. But I'm pretty easily amazed. I like to think of it as endearing and not silly.


Top with shredded cheese, sour cream, lime wedges, or serve over chips. Get crazy. Go with your gut. I prefer just cheese but you can eat whatever makes you happy.
Enjoy your deliciousness. Freeze your leftovers if there are any.
So this particular resolution yielded an awesome recipe. Only two more months until we get to make them all again! What's a resolution you've kept??
Friday, October 10, 2014
Guest Post Friday: Ode to Basil by the wickedly funny Robin Cochran
Robin is back for Guest Post Friday!! I can't explain to y'all how accurately she is portraying our delusional dreams of being adorably southern on TV. We are absolutely insane. And also, THAT BOOK. I bought it after staring at hers for multiple hours and have given it to my other favorite foodie, my Uncle Sid. You need it. Everyone with a refrigerator needs it.
After I got married a million years ago, I suddenly became responsible for providing meals on a daily basis for my husband, and I had to learn how to cook. There was a time in our early marriage when I would brown ground beef and add a box of Hamburger Helper and feel like I had really accomplished something in the kitchen. And let’s be real - I HAD. I successfully fed myself and my husband. I followed directions on a box and combined ingredients. And no one got sick people rarely got sick in the aftermath of my cooking.
My cooking has come a long way since then. I don’t know what prompted it, other than me just being tired of cooking the same stuff every single week (“Thursday is frozen pizza night!”). But somewhere along the way, I started loving to cook. I guess it became a way that I could be creative. I obsessively watched the Food Network and tried to remember all of the tricks and tips that I saw the professional TV chefs show me. I tried to pay attention to what ingredients “paired nicely.” I was constantly looking for new recipes to try. I would think for days about my menu plan for the coming week. I was always on the lookout for a great new cookbook. I geeked out so hard on food and cooking that for my birthday one year, I asked my husband for this book:
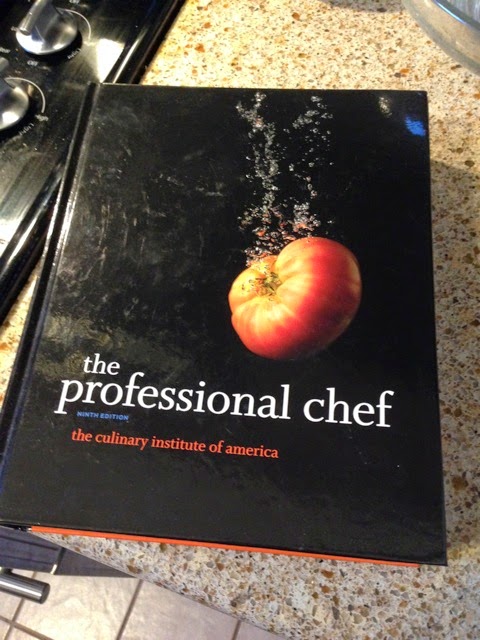 |
| This book. A friend from Huntsville who is a chef recommended this book to me when I sat beside him during Wednesday night dinner at church and asked him a thousand questions about being a chef and culinary school and what great recipes he was using…this book is what he calls the “Culinary Bible” - and IT. IS. AWESOME. |
When I met Whitney and we discovered our mutual love of food/cooking, we immediately clicked because we could always discuss our plans for dinner, what recipes we had tried that worked/didn’t work, bounce ideas off of one another, etc. Whitney and I even invented this thing called “Cook-Along” where we get together and one of us teaches the other our “go to” recipes. (Let’s be honest, we both have this daydream that we are actually on the Food Network, displaying our cute southern charm as well as our best kitchen secrets as people in our live studio audience smile at each other and whisper, “aren’t they adorable?” as we teach them how to properly season their oven roasted chicken. But, I digress.)
Through the course of my cooking experiences, I have fallen completely in love with certain ingredients. Whitney talks about her love for ingredients, specifically, almond extract here. Well, this is mine:
 |
| Hello, Beautiful. I bought this locally grown basil from the Farmer's Market that is a few blocks from our house. |
That’s it: fresh basil. I love everything about fresh basil. I wish that I could have a basil-scented air freshener for my whole house. Every single chance I get, I use it in cooking. I use basil propaganda to get other friends to use it when they cook. IT’S JUST SO GOOD. I use it when I make marinara sauce; I put it in Alfredo sauce (the recipe I use calls for parsley but YOU’RE NOT THE BOSS OF ME); and don’t even get me started on how many different uses I can find for fresh basil pesto (homemade pizza, italian sub sandwiches, toothpaste…ok, maybe not that last one). This ingredient is so versatile and flavorful, it is almost guaranteed to take an average dish to the next level.
So what about ya’ll? What ingredients are you crazy for? Which ones do you spread propaganda about?
Wednesday, October 1, 2014
Cherry Pork Chili
This chili is one of the things I made during my Freezer Meals adventure. I just ate a giant bowl of it and it was AH-mazing. I will absolutely make it again. Also, not hard at all. You can either assemble all of the ingredients into a Ziploc bag and freeze, or make it right away.
Ingredients
3 cups ground pork, browned
1 large red onion, chopped
3 carrots, chopped
4-5 cloves of garlic, chopped
2 tbsp chili powder
1 tbsp cumin
16 oz frozen cherries
28 oz crushed tomatoes
1 cup enchilada sauce
1 bay leaf
1/4 tsp salt
1/4 tsp pepper
Whether you freeze it or not, cook it in the crockpot on low for 8 hours. I didn't have to add ANYTHING at the end of the day. DELICIOUS. Don't get freaked out the cherries aren't THAT prevalent of a flavor. The recipe serves 8 so I put half in one bag and half in another. I will FOR SURE make this again. I didn't take any pictures because I was too busy stuffing my face.
In conclusion, easy, fast, delicious, no clean up.
WAIT.
Have I told you about crock pot liners yet? If I have just ignore this part. Listen, if you don't use a crock pot liner I can't understand you. Go directly to the store and buy them. If these items didn't exist I would just throw my crock pot away. They are THAT critical. Imagine if after every time you cooked, you just threw the pots and pans away and had nothing to clean up..THAT'S WHAT A CROCK POT LINER ACCOMPLISHES. If you aren't sold by that description you are beyond help.
I can't even think of a good question to end with because I'm just wondering why anyone on earth wouldn't use a crock pot liner. This may keep me up tonight.
Sunday, September 28, 2014
NYC Day 2
Day two we slept in just a smidge. I woke up first because my stomach doesn't care if I'm tired; it demands food. So I ate my leftover Carbonara and just relaxed for a little while. We had some pretty intense standing/walking stuff planned on day 2, so the rest was good.
I say we because OBVIOUSLY Casey and I helped a ton with the planning/prep for this trip.
I'm almost sure we did SOME work.
Any??
.....
Okay we did nothing. But in our defense Laurel likes to plan and she has fancy spreadsheets with ratings called Smith Stars so like really what can these two idiots contribute to that?
While we were on our way to go to the Statue of Liberty we stopped in to a little deli named Stir for lunch. I got a sandwich called the Broadway and it was very interesting. It had tiny chopped up sweet pickles in it, which I HATE. I HATE sweet pickles. But this..it was incredible. It had tiny thin fried onion strings and pastrami and OMG Italian panini heaven.
After that we did a full day of touristy activities. Ellis and Liberty Island were SO fun, especially as we tried to guess how often people per day fell down the stairs of the ferry or dropped their phones in the water. We are super cool people.

After Jen got off work, we met up with her for dinner. We went to S'MAC, an awesome mac and cheese place.
I ordered 4 Cheese: Cheddar, Muenster, Gruyere and a touch of Pecorino. Can you blame me? Did you READ that line up? Cheese addicts everywhere rejoice. However, after sampling everyone's, I had a touch of order regret. Don't you hate that? It was only a mild case but still. The thing that was my favorite out of what I tried was Alpine: a Swiss Mac that keeps you coming back for more. Gruyere coupled with its partner in crime, slab bacon. I didn't order because sometimes, and I know there will be naysayers, I think stuff has too much bacon. I love bacon. I really really do. But I don't want all my food to taste like bacon every single meal. The Alpine, however, had the perfect amount of bacon. I should've ordered it. Or built my own. ANYWAY, the 4 Cheese was great too.

After dinner, the four of us split up for the night. Casey and Jen went to a soccer game, and Laurel and I did a random assortment of funtivities, most of which will probably end up on her blog. Some are not fit for the masses on the interwebs. Just kidding. Mostly. Anyway, that night was one of my favorite parts of the entire trip because not only did Laurel and I have SO much fun, but we saw the sun set over the city from the Empire State Building. Absolutely magical. There are no words. We were exhausted and looked like death and they wouldn't let us sit down inside while we waited on sunset but oh my gosh you guys. SO worth it.
Day 2 ended with me watching Friends (my ALL TIME favorite show) IN NEW YORK, on a couch, eating hummus, with one of my favorite people on the couch next to me. It was one of those times where you just love your life more than you thought you ever could. Tell me some surreal and simple moment where you were unbelievably happy! Not when you won the lottery or something crazy, just one of those blissful sweet moments.
I say we because OBVIOUSLY Casey and I helped a ton with the planning/prep for this trip.
I'm almost sure we did SOME work.
Any??
.....
Okay we did nothing. But in our defense Laurel likes to plan and she has fancy spreadsheets with ratings called Smith Stars so like really what can these two idiots contribute to that?
 |
| The answer is nothing. We can contribute nothing. I mean look at us. Ewww no don't. |
While we were on our way to go to the Statue of Liberty we stopped in to a little deli named Stir for lunch. I got a sandwich called the Broadway and it was very interesting. It had tiny chopped up sweet pickles in it, which I HATE. I HATE sweet pickles. But this..it was incredible. It had tiny thin fried onion strings and pastrami and OMG Italian panini heaven.
After that we did a full day of touristy activities. Ellis and Liberty Island were SO fun, especially as we tried to guess how often people per day fell down the stairs of the ferry or dropped their phones in the water. We are super cool people.
 |
| I wish I could explain to you this photo. But I can't. Not the venue. Just enjoy your own questions and laugh. |
 |
| Did you know ferry rides are windy and impossible to look cute on? |
 |
| Watch out for the giant hole in the street. By the door. |
After dinner, the four of us split up for the night. Casey and Jen went to a soccer game, and Laurel and I did a random assortment of funtivities, most of which will probably end up on her blog. Some are not fit for the masses on the interwebs. Just kidding. Mostly. Anyway, that night was one of my favorite parts of the entire trip because not only did Laurel and I have SO much fun, but we saw the sun set over the city from the Empire State Building. Absolutely magical. There are no words. We were exhausted and looked like death and they wouldn't let us sit down inside while we waited on sunset but oh my gosh you guys. SO worth it.
 |
| Best. Night. Ever. |
 |
| A little bit mesmerized. |
Day 2 ended with me watching Friends (my ALL TIME favorite show) IN NEW YORK, on a couch, eating hummus, with one of my favorite people on the couch next to me. It was one of those times where you just love your life more than you thought you ever could. Tell me some surreal and simple moment where you were unbelievably happy! Not when you won the lottery or something crazy, just one of those blissful sweet moments.
 |
| Empire State Building |
Thursday, September 25, 2014
Freezer Meals
My life is crazy. My schedule is crazy. I help take care of a lot of people. Even though I wish I could just spend 3 hours cooking dinner ever night and experimenting with new flavors and techniques and ingredients..I have way too much to do for all that. I took a little leaf of out my friend Laurel's play book and decided to make some freezer meals (basically I want to be just like her when I grow up. That is not an exaggeration. Go read her blog.)
The main resource I used was www.onceamonthmeals.com. I wanted this process to be as fast and painless as possible, so I was looking for things that required no cooking ahead, and could be made in the crock pot. Basically, I wanted to assemble things in a bag and then be able to eat it with zero work later. But you know me, I can't follow instructions. Like at all. So, visit their website for their ideas, and you can see which ones I loved and modified here. I won't be posting anything until I actually eat it, so more will come later. First up, Pineapple Beef Teriyaki.
Pineapple Beef Teriyaki
20 oz pineapple chunks (if you use canned, don't drain it)
1 1/4 cup red onion, diced
3/4 cup of teriyaki sauce
1 tsp ground ginger
1 cup green bell pepper, sliced
2 tbsp sesame seeds
2.5 pounds of sirloin tips (Original recipe calls for beef stew meat, but we had sirloin tip roast and I cut it up. Use whatever is on sale that week.)
Combine all ingredients and put in gallon freezer storage bags. Label your bag with your instructions: "Thaw & cook on low in crockpot for 7 hours"
A few notes:
-This recipe serves 6, so I divided mine into two bags.
-My pickiest friend in the world loved it so much she made it after she had it when we went to the beach.
-I served it over rice.
-It tastes better if you freeze it. If you just follow the instructions and cook it, it's good, but not as good as when you freeze it first.
-The first time I made it, I cooked it on high for 4 hours. It was fine.
-I absolutely, under no circumstances, can I spell teriyaki without spell check/autocorrect.
-Do you have crock pot liner bags? If you don't, I'm about to change your life. Go buy some. You will never have to wash your crock pot again. You will want to abandon any and all stove cooking for a while. Enjoy your crock pot honeymoon.
What do you do when you need to prepare for a busy season of life?
 |
| Gelato break in NYC |
Pineapple Beef Teriyaki
20 oz pineapple chunks (if you use canned, don't drain it)
1 1/4 cup red onion, diced
3/4 cup of teriyaki sauce
1 tsp ground ginger
1 cup green bell pepper, sliced
2 tbsp sesame seeds
2.5 pounds of sirloin tips (Original recipe calls for beef stew meat, but we had sirloin tip roast and I cut it up. Use whatever is on sale that week.)
Combine all ingredients and put in gallon freezer storage bags. Label your bag with your instructions: "Thaw & cook on low in crockpot for 7 hours"
A few notes:
-This recipe serves 6, so I divided mine into two bags.
-My pickiest friend in the world loved it so much she made it after she had it when we went to the beach.
 |
| The pickiest most wonderful human alive, my friend Jen. |
-I served it over rice.
-It tastes better if you freeze it. If you just follow the instructions and cook it, it's good, but not as good as when you freeze it first.
-The first time I made it, I cooked it on high for 4 hours. It was fine.
-I absolutely, under no circumstances, can I spell teriyaki without spell check/autocorrect.
-Do you have crock pot liner bags? If you don't, I'm about to change your life. Go buy some. You will never have to wash your crock pot again. You will want to abandon any and all stove cooking for a while. Enjoy your crock pot honeymoon.
What do you do when you need to prepare for a busy season of life?
NYC: Intro & Day One
This summer, I was invited on a trip to NYC with some of my very favorite people, Casey & Laurel Smith. The trip was insanely wonderful and busy, and Laurel took crazy amounts of time out of her life to make sure she planned a trip with everything that I wanted to see! I hope you will go read about our adventures on her blog, like that time I made Casey throw the plate.
On the way home from the airport, Laurel and I decided that I would blog food and she would blog..everything else. That girl takes care of everything. Love you! It was the most fun time and I don't think I can ever say thank you enough to either of you for letting me third wheel your vacation. I mean seriously. Who does that? The Smiths.
On the way home from the airport, Laurel and I decided that I would blog food and she would blog..everything else. That girl takes care of everything. Love you! It was the most fun time and I don't think I can ever say thank you enough to either of you for letting me third wheel your vacation. I mean seriously. Who does that? The Smiths.
Enough with the non-food words. I think the easiest way to explain to you how much awesome food I ate is to tell you about all of it. I literally wrote down EVERYTHING I ate on this trip on a note in my phone. Most of my days revolve around food anyway, but I took it to a new level in the Big Apple. So, without further ado, Day One.
Breakfast/Travel Food:
Breakfast/Travel Food:
Bagel at Starbucks
My free pretzels from airplane. Plus someone else's pretzels because I don't say no to free food.
Lunch/Snack:
Lunch/Snack:
We were in line for the Daily Show the entire day pretty much, so we took turns going to this little store on the corner to get lunch. Think a gas station but with no gas pumps. A convenience store I guess you'd say. But it was nice, and they had basically a full sandwich shop. Plus air conditioning. I got an Italian panini that was pretty good but I couldn't finish it because it was sooo hot outside. Good pickle though.
 |
| The Daily Show where we saw MELISSA. MCCARTHY. Just ignore our precious exhausted faces. |
Dinner:
Absolutely, without a doubt, in my top three favorite meals on the trip. See how definitive that was? We were at Mario Batali's Otto restaurant. So incredible. The entire meal was divine from start to finish. For our appetizer, we had a cheese plate that Laurel and her friend Jen (our super generous hostess) had already tried several times. If I went back, I would probably just order cheese over and over until I was full. It was served with the most AMAZING peppered truffle honey and bread. Since my return, I have literally dipped sliced bread in honey with plain black pepper in it. It's no where near as good..but it's still better than no honey. Just trust me here.
 |
| Let's see if I can pull myself out of fantasizing about cheese plates long enough to finish this post. |
My entree was Spaghetti alla Carbonara. It was SO good and different from any carbonara I've ever had. The pancetta added this deeper salty flavor that blew my mind. The scallions kept all the flavors from being too heavy..it was perfection in a bowl.
After dinner, we went to Laurel's favorite place in NYC, Molly's. This is where the infamous plate/shoe throwing occurred. I don't have a giant sweet tooth, but I like cupcakes pretty well. I liked the atmosphere of Molly's more than anything. It was so fun and cute! I had a Lemon Meringue Cupcake, which I didn't even eat until the next day. But Oh. My. Gosh. The icing. It was like if meringue and marshmallow creme (two of my favorite sweet things ever) had a baby. A delicious baby. Incredible. Someone get me a jar of Marshmallow Creme stat.
Several more NYC posts headed your way...but for those of you who've been, I want to hear the best thing you've ever eaten in NYC!
 |
| I'm checking flight prices to go back right now. |
After dinner, we went to Laurel's favorite place in NYC, Molly's. This is where the infamous plate/shoe throwing occurred. I don't have a giant sweet tooth, but I like cupcakes pretty well. I liked the atmosphere of Molly's more than anything. It was so fun and cute! I had a Lemon Meringue Cupcake, which I didn't even eat until the next day. But Oh. My. Gosh. The icing. It was like if meringue and marshmallow creme (two of my favorite sweet things ever) had a baby. A delicious baby. Incredible. Someone get me a jar of Marshmallow Creme stat.
 |
| My eyes are open but it's like I'm not there. |
 |
| I think this HAS to be pre-plate throwing based on my smile. I don't look embarrassed yet. |
Several more NYC posts headed your way...but for those of you who've been, I want to hear the best thing you've ever eaten in NYC!
Thursday, September 11, 2014
#collegekitchen
A lot of sweet girls from the student ministry that I work for are growing up. It's so cool because I get to see them turning into these awesome young women who doing some super cool stuff with their lives. Some are starting to cook on their own away at college, some are starting to try their hand in their mom's kitchen. Because we all know food is my love language, I've really wanted to put together a cookbook for them of some of my first ever recipes that I made for myself when I first started cooking. But we also all know that I will never actually get around to that. So girls, you get a blog series. Hope you love it and all it's non-grand gesture glory.
I always grew up around cooking. Both my grandmothers are ridiculously skilled in the kitchen. I've always helped. I even cooked a few things on my own. But I really didn't find my way in the kitchen until about February of my first year of college. I pretty much had eaten all the frozen ravioli, ramen, popcorn, and carrots and ranch that a person can eat. You can't just survive on carrots and ranch. *JIm Gaffigan audience member voice: Hey that's the name of this blog...* While most people in college probably ignore this feeling, the fat kid inside me couldn't let it go. I NEEDED some real food. So, I would call my grandmother, and tell her what I was craving. She'd tell me how to make it, I would write it down. Grocery store run (in my backyard basically. How obsessed do you have to be with food to practically live in a grocery store parking lot? I digress.) Once I had the ingredients, I basically made Mamaw talk me the entire time I cooked it. Kind of like having a cooking instructor. This was critical because she didn't usually have measurements or anything official. Mostly it was, "add in this until it starts to look___" or "just pour a splash of milk in" or "you know, until it looks right." I blame her for my terrible instruction giving skills. Which is funny since I try to WRITE YOU PEOPLE RECIPES.
That's the short version of how I learned to cook back on ol' Reed Street in Tuscaloosa in 20…you don't need to know the year. Now, my lovelies, I will attempt to help you fill the void in your hearts and stomachs left by moving away from your momma's kitchen. These recipes would be great for any beginner/busy person. If you have already obtained your degree, you are still 100% allowed to make them.
Two Ingredient Pork Chops
1 lb. of pork chops
1 can of sliced peaches
Season your pork chops with salt and pepper. Heat a non stick skillet over medium high. Once it is hot, place the pork chops in. Cook for about 5-7 minutes, until they get a little golden color on them. Don't mess with them while you wait. Just leave them sitting there until you get ready to check for color/flip. Once you flip them, leave them for about another 10 minutes.
Then add your peaches in with juice and everything.
Turn the heat down to medium, or even low. This depends on your stove. What you want is a steady simmer. Tiny bubbles. What you DON'T want is huge bubbles threatening to overflow the skillet. Let that cook, covered, for another 15 minutes to 30 minutes. The longer you can let them simmer, the more tender they will be, and the more concentrated the peach flavor will get. Just trust me, fruit and pork is a winning combo.
Make a packet of instant mashed potatoes and a steamer bag of veggies, and you are DONE.


Home cooked meal for the win.
This phase of life is so fun. I wish I could come stand in all of your kitchens with you and see you finish each and every meal you attempt. If you try and fail, that's fine. That's why you have Buffalo Phil's and Momma G's and Dominos. I can't wait to hear how it all turns out!
P.S. If this girl can learn to cook over the phone, you can too. Clearly I knew what I was doing in life.
I always grew up around cooking. Both my grandmothers are ridiculously skilled in the kitchen. I've always helped. I even cooked a few things on my own. But I really didn't find my way in the kitchen until about February of my first year of college. I pretty much had eaten all the frozen ravioli, ramen, popcorn, and carrots and ranch that a person can eat. You can't just survive on carrots and ranch. *JIm Gaffigan audience member voice: Hey that's the name of this blog...* While most people in college probably ignore this feeling, the fat kid inside me couldn't let it go. I NEEDED some real food. So, I would call my grandmother, and tell her what I was craving. She'd tell me how to make it, I would write it down. Grocery store run (in my backyard basically. How obsessed do you have to be with food to practically live in a grocery store parking lot? I digress.) Once I had the ingredients, I basically made Mamaw talk me the entire time I cooked it. Kind of like having a cooking instructor. This was critical because she didn't usually have measurements or anything official. Mostly it was, "add in this until it starts to look___" or "just pour a splash of milk in" or "you know, until it looks right." I blame her for my terrible instruction giving skills. Which is funny since I try to WRITE YOU PEOPLE RECIPES.
That's the short version of how I learned to cook back on ol' Reed Street in Tuscaloosa in 20…you don't need to know the year. Now, my lovelies, I will attempt to help you fill the void in your hearts and stomachs left by moving away from your momma's kitchen. These recipes would be great for any beginner/busy person. If you have already obtained your degree, you are still 100% allowed to make them.
Two Ingredient Pork Chops
1 lb. of pork chops
1 can of sliced peaches
Season your pork chops with salt and pepper. Heat a non stick skillet over medium high. Once it is hot, place the pork chops in. Cook for about 5-7 minutes, until they get a little golden color on them. Don't mess with them while you wait. Just leave them sitting there until you get ready to check for color/flip. Once you flip them, leave them for about another 10 minutes.
 |
 |
 |
Make a packet of instant mashed potatoes and a steamer bag of veggies, and you are DONE.


Home cooked meal for the win.
This phase of life is so fun. I wish I could come stand in all of your kitchens with you and see you finish each and every meal you attempt. If you try and fail, that's fine. That's why you have Buffalo Phil's and Momma G's and Dominos. I can't wait to hear how it all turns out!
P.S. If this girl can learn to cook over the phone, you can too. Clearly I knew what I was doing in life.
 |
| Red hair. Guitar hero. Oh, college. |
Monday, July 28, 2014
Nannie's Mac and Cheese
Every Sunday at my Nannie's, we always have fried chicken and lots of veggies. Some change
from week to week but we ALWAYS have macaroni and cheese..its everyone's
favorite. The first time I made it was one of my greatest accomplishments in the kitchen.
Nannie has always had these blue stirring spoons that her sister would bring back from where she lived in Mexico, and I always loved them when I was a kid. Nannie cooks everything with them. When I got my own kitchen, she gave me three of my own! My copy of this recipe had the flour measured in "blue spoon" increments, so I had to figure out how "blue spoons" convert to cups:)
Ingredients
1/3 cup of all purpose flour
3-4 tbsp butter
1 cup macaroni
1 1/2 cups of Velveeta (cut up into small cubes)
2 cups milk (you probably won't need that entire amount, add slowly)
First, cook the cup of macaroni. While it is boiling, melt butter in the pot. Then stir in flour with a fork or a whisk until its combined. It will kind of look like a paste. I couldn't believe that little amount of butter could hold all that flour but it does. Kitchen science magic that I don't need to understand. Wait about 30 seconds, then add the Velveeta (its about 1/3 of the block if you don't want to measure) and milk. Whisk together until lumps are gone, over medium low heat. Let stand for two minutes to thicken (it will thicken even more in the oven). Then add pasta and stir.
Put in an oven safe dish and bake on 375 for 7-9 minutes or until the top gets a little golden brown, whichever you want. Mine never seems to get brown, but you can tell it that it's starting to thicken up a lot on the top. That's when it's done!
What do have you successfully replicated of your mom or grandmother that makes you feel like you've just won a James Beard award?
Friday, July 25, 2014
Flashback Friday: 5 Minute Pizza
*This is from way back in the early blog days, on the old blog. March 2011. I don't even think they make this cooking cream anymore. Ignore how blah my writing is (this will just make you appreciate me more now) and just use soft cream cheese I guess. The result will be worth the boring instructions.
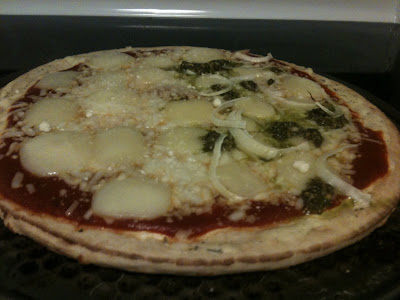
For the second week in a row I got that new Philadelphia Cooking Creme for 50 cents. BUT they were out of the original that I wanted. So I decided to try the Italian Herb and Cheese. Fast forward to a Saturday night where I've spent the whole day doing chores, and I'm way to tired to cook a big elaborate meal. I have a a pizza crust sitting on the counter, pizza sauce and mozzarella in the freezer and I thought, yep that's all I need. But of course, once I got in the kitchen..the urge to experiment hit. Here are the results!
Ingredients
One pre made pizza crust (I'm pretty sure I used Boboli)
Pizza Sauce (Think I use Ragu, but any will work)
Shredded Mozzarella
Philadelphia Italian Herb and Cheese Cooking Creme
Sliced Provolone
Store Bought Pesto
Few Slices of Yellow Onion
First I spread a thin layer of the cooking creme on the pizza crust with a spatula. Then I spread pizza sauce on top of that layer with the back of a big spoon, being careful not to press too hard and pull the creme through.

Next I put handfuls of mozzarella cheese all over. I had some sliced provolone in the fridge leftover from another recipe and I really wanted to use it, so I chopped up the slices and put them all over the pizza. Now you non veggie people, this is where the recipe ends.

But not for my half! I sliced up a little yellow onion and spread the pieces over my half. Not very much at all, just enough to give it a little flavor. Then I got a spoonful of pesto and let little drops fall off the spoon over my half. Then I just followed the baking instructions on my pizza crust! It literally took 5 minutes to prepare! And there was none leftover so I'd say it was well received!

Monday, July 14, 2014
Vodka Cream Sauce
Sauce. I can never get enough. Any meal that comes with sauce I usually order extra. When I make new recipes that have a sauce, I generally double the sauce the first time I ever cook it. Salad dressing, gravy, dipping sauce, pasta sauce..I want more. I don't really care how much is already there, I still probably need a little more. This is one of my easiest sauces. It's a crowd pleaser, doesn't take too long, and you don't have to worry if you didn't plan ahead, nothing to lay out or thaw. No odd ingredients to find.
Ingredients
Butter or olive oil
I onion, diced
4 cloves of garlic, diced
1 cup of vodka
28 oz can crushed tomatoes
1 cup chicken stock
3/4 cup heavy cream
2 tbsp dried parsley
2 tbsp dried basil
Salt and pepper
I've substituted everything you can think of for heavy cream out of desperation to make this sauce and not go to the store. Cream cheese, canned milk, regular milk, sour cream..combinations of those..it's never been bad.
Method
In a large non stick skillet or sauce pan, melt butter on medium high heat. Add onions and cook until they are tender and translucent. Then add garlic. Make sure you have plenty of oil or butter still before you out the garlic in, stirring often it often to keep it from burning.
Believe me when I tell you that if you burn garlic, your dish can not be saved. No matter what you're making. You have to throw it all away and wash the skillet. Don't think you can still use that skillet. The taste of burnt garlic permeates everything. It's like the glitter of flavors. Won't go away ever.
After the garlic has cooked for 2-3 minutes, add in the vodka and turn your heat up a little, letting the vodka simmer until it has reduced down a little. This will probably take about 5 minutes. Next add tomatoes, stock, salt and pepper, and herbs. Let those simmer on low for anywhere from 5-30 minutes, depending on when you want to eat. About 5 minutes before you want to eat, add the heavy cream and stir until your sauce turns a nice pink color. Add in a handful of Parmesan cheese and stir until melted.
Serve over your favorite pasta. Have I told y'all how much long cut pasta annoys me? I mean there are a handful of things I use it for but in general I abhor it. It's hard to eat, it sticks together, it makes you slap your own self in the face with sauce. You can have your angel hair and fettuccine. Give me a penne, rigatoni, ziti- basically anything that is bite sized.
AAAAANYway, pasta rant over. I hope you make this for yourself and then tell yourself how talented you are, which I do every time I make it. What makes you feel like a rockstar in the kitchen?
Thursday, July 10, 2014
Sesame Ginger Chicken
This is a recipe I concocted way back in 2008. I was in a
cooking rut and looking for ways to make chicken interesting. The first 5
times I made it I only used the chicken and the salad dressing, it
wasn't until later that I dug around in the spice cabinet and started
adding ingredients. The point is it can be as simple or elaborate as you
like! Oh and the low fat dressing tastes the exact same as the regular
dressing. Just a little FYI :)
Ingredients
1 pound of chicken breasts or tenderloins
1/2 bottle of Newman's Own Sesame Ginger salad dressing
Ginger, ground
Sesame Seeds
Lime Juice
Rice
To start, chop the chicken breasts into strips or cubes. Put in a nonstick skillet or wok over medium high and cook for ten minutes or so. Flip chicken pieces halfway through.
While that is cooking, prepare rice according to the directions on the bag or box.
After the chicken is cooked through, turn down to medium. Add liberal amounts of lime juice to the chicken. Pour in dressing, enough to fill the bottom of your pan. Sprinkle ginger and sesame seeds in and let simmer for 10-15 more minutes. You can add more dressing if it cooks down too much.
I like to serve this over rice or alongside rice with some kind of sauce. I normally buy a great teriyaki glaze that I'm pretty sure is intended for basting meat with but I just like it on my rice. This meal is about $1.50 per serving, and you don't even have to go pick it up from your favorite takeout place!
What have you thrown in a skillet with chicken that blew your mind?
Tuesday, July 8, 2014
Accidental Enchiladas
Today I may have stumbled upon a great recipe. The problem is, it was one of those things where you just start throwing things in the skillet that sound good and you aren't all that worried about it. Like the lowest of pressure cooking situations. Therefore, there was no measuring of any kind (which is not uncommon in my kitchen at all and frustrates my non cooking friends to no end). BUT normally I at least pay attention enough to write a recipe with good enough estimates for my dearly devoted 20 readers. Tonight..not so much. So bear with me, this may be frustrating, but it will definitely be delicious. I just don't htink you can mess up these flavors. If you try and it's disgusting I'll buy you Taco Bell or something. Not really. It's just a nice thought don't get crazy.
This started with 2 chicken breasts and a pretty serious energy deficit. As usual, cooking started to activate every creative brain cell I have so what was supposed to be 3 ingredients (still would've been great that way) turned in to..well more than 3. Like I said, DON'T FREAK OUT ABOUT THIS ONE. If you don't have/like everything, don't put it in there. I'm pretty sure chicken and tortillas plain would be good if you covered it in cheese.
Ingredients
2 chicken breasts
Fajita seasoning (or ANY combo of good things like S&P, onion and garlic powders, cumin, chili powder, etc.. I like to mix my own fajita seasoning so I can control how salty it is..I have a weird palette. We'll discuss it another day)
About 2 cups bell peppers-diced
About 1 cup red onions-diced
1 can of black beans, rinsed and drained
1 small can of Mexicorn
2 cups of Mexican blend cheese
8-10 large flour tortillas
2 cans of enchilada sauce with green chiles
1 jar of Taco Sauce
Sour cream
PEOPLE. I can hear you freaking out already. What color bell peppers? I don't have mexicorn! I hate black beans! CALM YOURSELF. I used tricolor bell peppers because that's what I had. Anything will do. Don't have a red onion but DO have a yellow one? Use that. Don't go to the store to make this exactly. This is NOT science, as we've clearly already established my aptitude for science.
Preheat the oven to 350.
Cut the chicken up into small bites. Put a small amount of oil in a non stick skillet, set the heat on high. Once it gets hot, put your chicken in and spread it out. Then don't touch it for a few. Sprinkle your seasoning on top. I used quite a bit. They looked very coated. After about 4 minutes, stir/flip the pieces. Let them cook another 3-4 minutes. This is when my brain started shooting out ideas one right after another. I realized the enchiladas might be kind of empty so I started looking for filler. I added about hte same amount of bell peppers as chicken, and just a little less onion that than amount. Stirred that around for a few, still on high. I wanted the bell peppers to get softer. After about 5 minutes I dumped in a can of black beans and corn, and let all of that get heated through. Done with the filling!
I then scooped one large serving spoon of filling, or about 1/10th of the filling I made into a tortilla. Sprinkle some cheese on top of the filling like you are making a taco. I find it's easiest to lay wax paper on the counter, put the tortilla on it, scoop on the stuffing, then roll. Place the rolled enchilada seam side down in a 9x13 or larger glass dish (I sprayed mine with Pam first). Repeat this process, smushing the tortillas in to each other until you use all the filling or run out of space. I ran out of space. Gonna eat that leftover mixture tomorrow on a salad.
Pour the enchilada sauce on top, strategically so it will run down to the bottom. If I had been smarter I would've poured one can in the bottom of the dish. You should probably do that first. Then just pour the second can on top. Then I added about a cup of taco sauce, and the remaining cheese. Bake for 30 minutes uncovered.
Top each serving with a dollop or two or 5 of sour cream and more taco sauce as desired.
Good luck getting the first enchilada out if your pan was as full as mine. I put a cookie sheet under my dish to catch any spills in the oven which of course ensured no spills. The whole family gobbled it up. And by whole family I mean three people ate half of the pan.
What is the most fun thing you've accidentally made? How anxious are you about my measurements in this recipe on a scale from 1 to breathing in a bag?
Friday, July 4, 2014
Guest Post Friday: Salsa Debacle of 2014
Sooo my friend Robin may be the funniest human I know in real life. I'm thinking about just letting her take over my blog because not only is she so funny, she's so talented in the kitchen (although, this post doesn't really highlight that). She just moved away and I'm so sad, but reading/hearing all over her new food adventures is making me anxious to get to Columbus! Enjoy!
Let me preface this story by saying this - we all have kitchen failures from time to time. We aren’t all perfect Pinterest cooks who make picture-perfect meals every single time we step into the kitchen. Every now and then, we encounter an epic failure. I am here to tell you about one of my most recent ones. I will call this “The Salsa Debacle of 2014” (mainly because “debacle” is a fun word, but also because it’s an accurate description of actual events).
My family has recently relocated to Columbus, MS after my husband was called to be a minister at a local church here. Ya’ll, this town. It is charming and historic and quaint and awesome. We live downtown, within walking distance to the Farmer’s Market (!!!!!!). I completely love it here. Here is one of my first observations of this town and our people here: everyone has a vegetable garden. It is one of our most favorite surprises when church members bring us fresh veggies from their gardens. We have gotten cucumbers, crook-neck squash, blueberries, okra, tomatoes, bell peppers, corn, jalapeños, and chili peppers - and OH THE HOME-COOKED MEALS PEOPLE HAVE BROUGHT US. I can’t even talk about the squash casseroles. But, I digress. The point is, people have brought us fresh veggies and I have been trying to figure out how to use them before they go to waste.
So the other night, after receiving 2 garbage bags (you read that right) full of produce and examining the contents, I had this great idea to make my own salsa. I have actually made my own salsa before and it turned out really good, but unfortunately I didn’t keep the recipe and I couldn’t find it again. But, I am a pretty seasoned cook (no pun intended) and thought, “you know - I can pull this off without a recipe. HOW HARD CAN IT BE?”
So, I began by chopping the tomatoes. Oh, they were glorious Roma tomatoes (and who doesn’t love a fresh tomato?). I put them into my pot and started it on medium heat to cook them down as the base for my salsa. I added some salt and olive oil (because why not?) and then started adding more ingredients. Ya’ll, I was like a mad scientist. I was literally looking through our pantry trying to find things that would work in this salsa. I was chopping things and throwing them in, imagining myself hosting my own cooking show and explaining to my audience how “anybody can make your own salsa, you just need a little bit of ‘know-how.’” I chopped onions, garlic, cilantro, and threw it all into the pot. It was beautiful, and fresh, and smelled terrific. And then, I got to the chili peppers.
Now, before we got rid of our cable, I used to watch the Food Network non-stop. I know a surprising amount of information about cooking thanks to my friends at the Food Network. I vaguely remember a lesson from Bobby Flay when he reminded us that what makes chilies hot are the seeds. Anytime you are trying to cook with any sort of chili peppers, you need to 1) wear rubber gloves as you chop them (otherwise, you have the juice on your hands and you go to take your contacts out like 10 hours later and think you’re going blind. I mean….at least I heard that from a friend), and 2) take the seeds out of them before adding them to your dish. But ya’ll remember, I was in mad scientist/Food Network star mode and it didn’t even cross my mind to take the seeds out. I chopped those chili peppers up, and then the jalapeños, and threw them in the pot, seeds and all.
As I leaned over the pot to take in the wonderful smells after a few minutes of my salsa cooking with the peppers, I felt like I had been sprayed with mace. My eyes immediately started to water from the intense burn and my nose started running. “No big deal,” I thought as I wiped away the tears. “I can fix this up real quick. No worries!” So, I went back to the garbage bag of fresh veggies and pulled out an ear of corn. I cut the corn off the cob and threw the fat juicy kernels into my pot, grabbed a tortilla chip and tasted to see if the corn would help turn my salsa back into salsa instead of a vat of bioterrorism. No luck. It was like I was eating the lava straight out of a volcano. I added another ear of corn. No luck. My husband came in and tasted it and immediately went to the fridge and drank milk straight out of the jug. This was a disaster. My beautiful fresh veggies were on the brink of ruin. I even GOOGLED what to do and the best answer I could find was “make another run of salsa without the chilies and mix the 2 together.” ARE YOU KIDDING ME?
So, here’s what I did: I found a block of cream cheese in my fridge and began cutting off chunks of it and melting it in the pot with my tear gas. Slowly but surely, my salsa became edible again - but now it is a weird pink color with a very unique taste. My overall assessment of this dip (because I’m not sure what to really call it anymore) is “good, not great.” I mean, at least I didn’t have to throw it away. It’s still sitting in my refrigerator in a container and I’m the only one who has eaten any of it - but I’m not willing to call it a total loss yet. Maybe I’m just that stubborn.
See, it happens to all of us every now and then. So, what sort of kitchen debacles have YOU had recently?
Let me preface this story by saying this - we all have kitchen failures from time to time. We aren’t all perfect Pinterest cooks who make picture-perfect meals every single time we step into the kitchen. Every now and then, we encounter an epic failure. I am here to tell you about one of my most recent ones. I will call this “The Salsa Debacle of 2014” (mainly because “debacle” is a fun word, but also because it’s an accurate description of actual events).
See, it happens to all of us every now and then. So, what sort of kitchen debacles have YOU had recently?
Thursday, June 26, 2014
Pasta for the Men
Just the word pasta makes me hungry. I could eat it 3 times a week easily. I like almost anything with pasta in it. Somehow, though, the men in my family have gotten it in their heads that pasta isn't quite manly enough for them. And don't even try suggesting a meatless sauce. It's basically revived as if I said we just were skipping dinner all together.
They all eat it by the way. They even like it. But they groan when I say we're having it. Probably more to make my voice get squeaky than to voice real feelings.
So one day I'm flipping through one of the billions of magazines I get with recipes in them.
I saw this recipe and thought..hmmm..maybe the food critics will like this one. It didn't seem like something I would necessarily love, but but I was willing to give it a shot. WOW. I could not have been more wrong. Delicious. Zero leftovers delicious. Did I mention it takes like 18 minutes to make? Holy cow.
Ingredients
1 package of smoked sausage, diagonally cut into 1/4" thick slices
12 oz. pasta
1 onion, diced
2 cups heavy cream
Cajun seasoning
1 cup of shredded Parmesan cheese
Method
Cook pasta according to package. Saute the onion and sausage in a large (I use non stick) skillet over medium high heat until onions are tender, stirring occasionally. Add cream and Cajun seasoning. Okay here's where it gets tricky. The original recipe called for 2 teaspoons. Y'all. No. That sounds like a way for my insides to light themselves on fire while my esophagus fills with lava. Can't do it. Some of you love spicy food, put as much as you want. However, if you, like me, also have a volcano instead of a digestive system, then just sprinkle some in there, wait, and taste. If it tastes like plain cream, sprinkle more. I did this three times before I could even taste it. But I would always rather be careful than make something so hot I can't even enjoy it. If everything in italics is unbelievable madness to you, you're probably safe with the 2 teaspoons. Excuse me while I take Tums just thinking about it. Bring cream sauce to a boil, then reduce heat ad gently simmer until it begins to thicken. Remove from heat, stir in Parmesan. Please not from a green bottle. This should be refrigerated when you buy it. Stir in your cooked pasta and sprinkle some dried parsley on top if you feel fancy.
What is your familypicky finicky particular about?
They all eat it by the way. They even like it. But they groan when I say we're having it. Probably more to make my voice get squeaky than to voice real feelings.
So one day I'm flipping through one of the billions of magazines I get with recipes in them.
 |
| This is just from the past 2 weeks... |
I saw this recipe and thought..hmmm..maybe the food critics will like this one. It didn't seem like something I would necessarily love, but but I was willing to give it a shot. WOW. I could not have been more wrong. Delicious. Zero leftovers delicious. Did I mention it takes like 18 minutes to make? Holy cow.
Ingredients
1 package of smoked sausage, diagonally cut into 1/4" thick slices
12 oz. pasta
1 onion, diced
2 cups heavy cream
Cajun seasoning
1 cup of shredded Parmesan cheese
Method
Cook pasta according to package. Saute the onion and sausage in a large (I use non stick) skillet over medium high heat until onions are tender, stirring occasionally. Add cream and Cajun seasoning. Okay here's where it gets tricky. The original recipe called for 2 teaspoons. Y'all. No. That sounds like a way for my insides to light themselves on fire while my esophagus fills with lava. Can't do it. Some of you love spicy food, put as much as you want. However, if you, like me, also have a volcano instead of a digestive system, then just sprinkle some in there, wait, and taste. If it tastes like plain cream, sprinkle more. I did this three times before I could even taste it. But I would always rather be careful than make something so hot I can't even enjoy it. If everything in italics is unbelievable madness to you, you're probably safe with the 2 teaspoons. Excuse me while I take Tums just thinking about it. Bring cream sauce to a boil, then reduce heat ad gently simmer until it begins to thicken. Remove from heat, stir in Parmesan. Please not from a green bottle. This should be refrigerated when you buy it. Stir in your cooked pasta and sprinkle some dried parsley on top if you feel fancy.
What is your family
Tuesday, June 24, 2014
Summer Carbonara
This is a repost from 2011..I still LOVE to make this one. I thought it would be a good time to introduce it to you guys who are new to the blog since summer is upon us.
I've said it before, Rachael Ray is one of my favorite sources for new recipe ideas. I found a great summery pasta recipe I wanted to try, but as usual I had to do my own little switches and changes to make it my own. So here is my first ever carbonara! One piece of advice, chop everything before you start, especially the first time you make it. It isn't overly complicated, but it will help with the timing to have everything ready to go. I think it will be a lot faster the second time now that I know what I'm doing but either way I'll probably keep making it, because I have to say, it is YUMMY!
Ingredients
1lb fettucine
few tbsps of olive oil
1/2 package of turkey bacon, finely diced
12 oz bag of frozen corn, thawed(or canned corn)
1 small jalapeno, finely chopped
6 cloves of garlic, finely chopped
2 tsp thyme
2 tbsp parsley
1/2 cup white wine
3 large egg yolks
1/2 cup of pecorino romano cheese
1/2 cup of Parmesan cheese
1/4 cup of chives, chopped
Start by putting a large pot of water over high heat, and boil the pasta according to the instructions on the box.
Right before you put the pasta in the water, heat the olive oil in a large skillet over medium high heat. Add the bacon and cook until crispy.
Then add the corn and cook until it's lightly browned.
Once that the corn gets a little color, add the garlic, thyme and jalapeno. At this point I would recommend turning the heat down a little, and you may have to add a little more olive oil. Cook that for a couple of minutes and then add the parsley and white wine, reducing the heat to low. Simmer on low until the other components are ready.
When the pasta is done, get a cup of the cooking water out and reserve. Drain the pasta. While it is draining, use that water to temper the egg yolks. I had never done this before, but it is pretty easy! Basically you slowly beat the water into the egg yolks to bring the temperature up without scrambling the eggs.
Combine the pasta, the corn mixture, and egg yolks, and remove from heat. Add in about a handful of each cheese and start tossing the pasta. In about 2 minutes, the liquids will start to form a wonderful silky sauce.
You can top with more cheese and chives if desired! I'd love to hear how yours turns out!
Thursday, June 19, 2014
My First Huntsville Food Truck
A few weeks ago, my team at work got this idea that we wanted to go eat at a food truck. We checked Facebook and realized there was one that wouldn't be too far from our office. So we piled up in my boss' 4Runner and went on an adventure.
What we found was Crave Heat. A super cute bright blue truck with a giant gorilla painted on the side. After chatting with the guys who run it, we all made our choices. While we waited, we played some crazy video game on a TV built into the side of the truck. I tasted so many things and most of them were excellent, but here are the two that I'm still craving this many days later:
Fish Tacos-I'm a pretty big fish taco fan anyway, but these were exceptionally good. The thing that made them so awesome was the pineapple sauce on top. A little tangy, a teensy bit of heat to it (not too much people, trust me, I'm the biggest baby on the planet about spicy things). It was a wonderfully island-y combination
.
Quesadillas-So the tacos are more like an appetizer. If you want them, I'd get a double order. Or get three orders for two people. Just a little more than one order is perfect. After we ate our tacos and realized we were still hungry, we went back and got more food. Quesadillas this time. They are the opposite in portion sizing. One is PLENTY. Especially if you've already had an order of tacos. Cheesy goodness with delicious marinated meat. We just kept eating and kept eating and kept eating until it got embarrassing for everyone involved. And by "we" and "everyone" I mean me.
I can't wait to go to the Food Truck events downtown this summer! What's your favorite portable eatery in Huntsville?
Tuesday, June 17, 2014
Poor Food
When I was growing up, my mom and I lived with my grandparents. They still had a house in Florida and we were living with them in their new house in Huntsville. This two house/freshly moved scenario had happened to them many times before because Papaw was transferred often for his job. Mamaw knew from her own childhood and young adult life how to stretch a meal..so she had her go-tos when things were tight. But when you're 6, you don't really know what's poor food and what isn't. So I would beg for things like chicken and rice, and I just couldn't understand why they thought it was so funny! Tonight I made one of my favorite poor foods, fried potatoes and smoked sausage. Pretty easy, really cheap, feeds a lot of people AND it's amazingly delicious. Not much falls into all those categories. Here's what to do when you're over budget:
Fried Potatoes
Ingredients: Potatoes (about one big one per person or two littles), one package of smoked sausage, 1-2 onions depending on how big of a batch you are making
Peel your potatoes. Congratulations, that's literally the most difficult step.You are now halfway done. Cube your potatoes-I normally cut them in quarters long ways, then slice those strips into cubes. But it's really not that important as long as they are about the same size/thickness. Dice up an onion. Slice your smoked sausage into about 1/2 inch thick chunks. The thinner you slice them the more pieces you get so it's really up to you.
Put a little oil in a non stick skillet over medium high heat. Let it get hot for a minute or two, then throw in all of your ingredients. Salt and pepper them. The potatoes can take a good bit of salt, but just taste as you go to check. Once you have it in the skillet, don't stir it too much. Let a little golden brown color develop on everything. Stir and cook for about 20-30 minutes until the potatoes are tender. Remember, just taste as you go so you can adjust your salt/pepper. You're done! One skillet to wash, not very many dollars spent, delicious flavors produced.
I love this meal. Mamaw and I especially like greens and cornbread with it, if you're into that I'd recommend it. Otherwise any veggie will do.
What does your family make when you're pinching pennies?
Subscribe to:
Posts (Atom)